
Mount St Helens Hikes: First Timer's Guide
- jackie
- Aug 12, 2024
- 4 min read
Updated: Mar 29

Mt St Helens is an iconic, active volcano that last erupted in 1980 and was the worst volcanic eruption in US history. There's a lot of novelty and tragedy surrounding this place, and it was a privilege to be able to safely hike and explore a place that claimed the lives of so many. When you look into the crater from the top, you're looking into a piece of history and a piece of the future.

Before you Go
You will need to secure a permit to hike to the summit due to the popularity during the summer season. I recommend checking the website regularly because we were able to get a permit 1 week before the hike since there was a last-minute opening/cancellation, and this was towards the end of June. Make sure to check the weather report from the mountain weather report site. The weather dramatically changes throughout the hike, so check the temperature and wind speeds at each elevation of the mountain (base, mid, peak) and pack accordingly. I like to have a lightweight windbreaker that I can remove. Also, make sure you have the US annual national park pass.
Don't forget sunscreen!
Where to Stay
There aren't many accommodations to choose from if you're looking for somewhere close. It's about a 3.5-hour drive from Seattle and a 1.5-hour drive from Portland. Staying in Portland is a great option if you're visiting. Some places there are Mark Spencer in Old Town Portland, or Stay Pineapple.
You can also camp nearby or opt to stay at Lone Fir resort and RV camp; it's probably the closest place to the summer trailhead you can find.
If you're car camping, check out my other blog post on my car camping set up in my MINI cooper.

Let's get to the Hike...
We got a late start; we drove from Seattle that morning and arrived at the trailhead around 6:15 am. We started at 6:20 am and finished at about 4 pm. The road to reach the Ptarmigan trail is fine; some people were concerned about it being bumpy, but I didn't have any issues or concerns with it in my AWD MINI Countryman.


If you're going in the summer season, check the conditions here to see if the Climber's bivouac is open and plan to do the ptarmigan route, which starts you at the Climber's bivouac trailhead. The winter trail is known as worm flows. It took us 4.5 hours to reach the summit from the summer route, and the trail was safe and easy to follow.
These are the stats and breakdown from my apple watch:


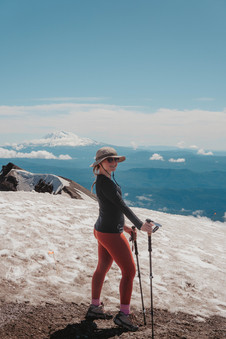
The first part of the hike was in the forest, but that didn't last for very long. After the forest, you start the rock scrambling. The sun rises early, so you won't have long before you'll need to apply sunscreen and put your hat on. There was a cloud inversion as we began our hike, and we started getting views of Mt hood almost immediately as we started the hike (left below). The view down (right below) was equally beautiful!


The rock scramble was long and steep, but it wasn't sketchy or scary. The rocks were very rough - the landscape is sharp, so it really scrapes your hands, so you'll need to bring gloves. We luckily saw that beforehand in the AllTrails reviews, so we were well prepared. The views keep getting more impressive as you climb. I recommend taking photos on your way up because the clouds tend to roll in during the afternoon, which can change the view, plus you'll want to spend your time glissading down anyway!


After lots of uphill, slow rock scrambling, you will eventually reach the weather station! It was a lot smaller than I had imagined. I thought it was going to be a bigger site, but we took a look and kept it moving! Mt Hood was far in the distance, which made for some great photo opportunities.


After the weather station, you still have a ton of hiking to do. The rest of the climb gets stee,p and there's really no flat parts; it's just a steep climb to the summit. We hiked a little bit and then got our microspikes on and poles out and switched over from the bouldering to the snow field since that was easier.
After lots of momentum, we finally reached the summit! We could see Mt Rainier, Mt Adams, and Mt hood in our 360, panoramic view. We grabbed our summit sandwiches and snacks (Rainier cherries of course, from the farmers market!) and enjoyed the view. We got lucky and the wind conditions were minimal, but some people experience strong winds at the summit, so be mindful thatit could happen for you. We did pull out our windbreaker to help reduce even the mild wind.


When we went at the end of June, there was a giant cornice at the top (see below), so the true summit was too unsafe and unstable to reach. The cornice made it harder to see inside the crater, but we still were able to see it, and some steam was rising when we walked a little further along the rim. There are hazard signs where you shouldn't walk. Someone had died a few months before when we hiked due to the cornice collapsing below them, so be very careful to watch for the signs and stay on the safe part of the trail.


Tips
The snow is super blinding on a sunny day. I have had friends get deep burns on their faces when glissading due to the snow reflecting the sun and burning their skin, even with sunscreen. You should bring a lightweight cover for your neck/face.
Camp at the trailhead or somewhere nearby. The morning drive was really rough for us; we didn't sleep much and got a speeding ticket at 2 am on the highway from Seattle.
Keep an eye on the mountain conditions in the days leading up to your hike. We checked 1 week out and then saw a permit available for that day that was clear. A week before, it showed the day before when we went as brutal and cold, and it did not lie according to the reviewers from the day before us. We got a sunny day as the weather app predicted.

Comentarios